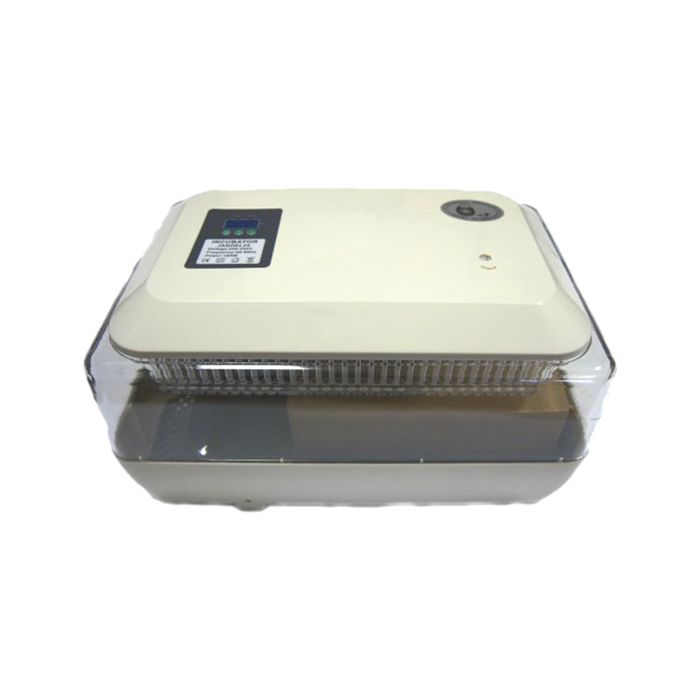
Automatic incubator for 30 chicken eggs 1pc
DESCRIPTION
An automatic incubator for 30 chicken eggs is a device for artificial hatching of young poultry from eggs. Designed for 9 eggs, mostly used at home.
ADVANTAGES
The temperature can be set between 30 В° C and 42 В° C, making the incubator suitable for many types of bird eggs.
The incubator has an audible alarm in case of overheating of the air inside the incubator. The alarm is triggered if the incubator runs out of water and it signals the owner to add water to moisten the eggs.
Suitable for both beginner poultry farmers.
Easy to operate.
Takes up little space, quite compact.
High percentage of poultry hatchability.
Economical power consumption.
MATERIAL
The material is plastic.
EQUIPMENT
The bottom of the incubator.
The upper part is the control unit.
Power cable-euro plug.
Mesh plate.
Movable tray.
Egg dividers.
User's manual.
CHARACTERISTIC
Egg capacity - 12 chicken, 6 goose, 20 quail.
Color - white / black.
Safe, reinforced, durable, high quality.
MODE OF APPLICATION
Base with two holes at the front for refilling the internal tanks. Add 300-350ml water to the bottom hole (# 1) of the reservoir on the first day of incubation. And add 100-150ml of water every day in order to ensure the required level of humidity inside the incubator. Make sure there is always water in the small reservoir. Before hatching (usually 18 days (for chickens) from the start of incubation) add 200-250 ml. water into the upper hole (No. 2) reservoir to raise the humidity level to 65-75%. The second container for the veda should always be filled with water from the 18th to the 22nd day (since a higher level of humidity in the incubator is required during hatching and hatching).
Place the mesh plate with the smooth surface facing up for better glide-turning of the eggs.
Place the movable egg stream on the mesh plate and place the baffles according to the size of the incubation egg, the width of each compartment should be 5-10mm wider than the diameter of the egg to ensure a good turn of the eggs without hindrance.
Note that there is a rod protruding from the upper, transparent part of the incubator to ensure that the eggs turn. The rod must be inserted into the channel of the movable tray, thus turning the eggs. The engine runs constantly when the incubator is connected to the network. The egg turning cycle takes four hours.
The top cover is placed on the bottom of the incubator. Please note that both parts should be flat on top of each other and fit snugly against each other. The incubator is ready for operation and can be connected to the power supply.
If the incubator does not work (i.e.: the fan does not rotate, does not show the temperature), then check the condition of the fuse on the back of the incubator lid and, if necessary, replace it. The fuse can be damaged if the incubator is deformed or moisture gets into it. After turning on the incubator, the indicator may show the sign '' L ''. To switch to the current temperature display mode, press any of the three buttons on the control panel. Please do not change the incubator settings if you are not sure how to do it and what it is for. The factory temperature settings allow for high hatchability even without adjustment. During hatching, the vent on the top cover of the incubator (right) must be fully open.
Three days before the end of incubation (i.e. 18 days for chickens), remove the movable tray from the incubator and spread the egg over the entire surface of the mesh plate. If there is a bite on the eggs before, these eggs must be placed with the bite up. Do not remove chicks and shells before hatching, i.e. until the chicks are completely dry (fluffy), this can lead to a loss of moisture. After incubation is complete, chicks can be moved for subsequent feeding or vaccination.
Control unit programming:
1. SET button: Press SET to enter the temperature value. Press the <+> or <-> buttons to change the temperature. If you hold down the <+> or <-> buttons for more than 3 seconds, the change is faster. By pressing SET again, you exit the temperature change mode and save the entered value. Q: By pressing SET for more than 3 seconds, you get to the function menu. Pressing <+> or <->, select the desired function to change. By pressing SET on the selected function, you can set the value for that function using the <+> or <-> buttons. By pressing SET, you save the set parameters and exit the menu. If you do not touch the keyboard for more than 5 seconds, the system will automatically exit the menu.
2. <+>: Increase button.
3. <->. Decrease button.
4. Description of light indication: WORK (indicator on the right above the display) - lights up when the heater is turned on. SET (indicator on the left above the display) - lights up when the function of changing incubation parameters is activated.
Temperature control during incubation. Different types of birds require different incubation modes. Example: the incubation period of chicken eggs is 21 days, 38.2 C from 1 to 6th day, 38 C from 7 to 14th day, 37.8 C on the 15th day, ac 16th to 21st day 37.2 ^ 37.5 FROM.
Humidity control: During incubation, different relative humidity values ​​are required. The relative humidity should be between 55% ~ 60% in the earlier stages of incubation to ensure uniform heating for the embryo, which is good for the formation of allantoic fluid and amniotic fluid, the relative humidity should be within 30% -55% during the middle stage of incubation , the relative humidity in the last stage of incubation should be between 65% - 75%, since high relative humidity is good for chicks to bite.
Cleaning and disinfection after incubation: Clean and wipe the incubator. For disinfection, use finely dispersed spraying of solutions of potassium permanganate and pharmacalin
Inspection of the incubator before incubation: Check all parts of the incubator, see if the fan blades are spinning, if there are any chips or cracks on the incubator body, if all the incubator components are fixed properly, then adjust the temperature and fill the tanks with water. Make a trial (12-24 hours) run of the incubator until the set temperature is reached, if the incubator is working normally, you can put it in it.
Fresh eggs should be selected for incubation and storage. The collection of eggs is done within 5 days. For eggs stored for more than 5 days, the probability of embryo formation is reduced by 4% -7%. The best temperature for storing hatching eggs is 12-15C.
To stop turning eggs, you need to remove the movable tray from the incubator three days before the end of incubation (i.e. 18 days for chickens) and spread the eggs in one layer over the entire plane of the mesh plate.
PACKAGING
Available in 1pc.
Specifications
Bonus points
0
KolVUP
1
Manufacturer
Vetspectrum
Teaser
for artificial hatching of young poultry from eggs